吃透了很好改装,
这家伙算雷锋了,啥都高数你
THE MOTOR
你不需要柴油。 。 。
海洋通道。
“我们没有时间表,要求我们使其恢复到上一次的码头。”
很多人都写成,并评论说,电动马达仅用于天水手谁的每一天都不会很远好,你需要一个可靠的柴油发动机长途巡航。但我们认为事实正好相反。因为我们没有一个码头每天晚上绑起来并收取我们的电池,我们依靠航行补给我们的系统。时间越长,我们航行,并多晒太阳,我们得到的更多动力。因为我们没有一个9-5在一个有趣的周末了船上年底回国做,我们没有时间表,要求我们让它回到码头上的时候,不管什么风正在做什么。因此,我们认为,电动马达,这取决于你的帆船造型,可适应任何船。但是,你必须愿意来解决的一个主要退缩,范围。
范围是一个主要的缺点是电动机。但是,有帆船,还有一些适当的航海技术,我们发现,我们真的不需要电机就像我们原来想象。对于那些谁拥有的时间表,混合动力系统的可能性可以很好地工作。它包括一个电力系统的所有优点与加回了柴油或汽油发电机组额定延长驾驶提供足够的动力。一些公司甚至提供一台电动机,像这样的,可以安装在平行于现有的柴油发动机。所以多数驾驶的是与传统的柴油然而对于短时间完成,像码头周围移动时,电驱动可以用来代替。这还采用从纺丝丙捕捉能力,同时帆船,通常被称为“再生”或“再生”的好处。
我们转换为电力。 。 。
开始我们的电机。
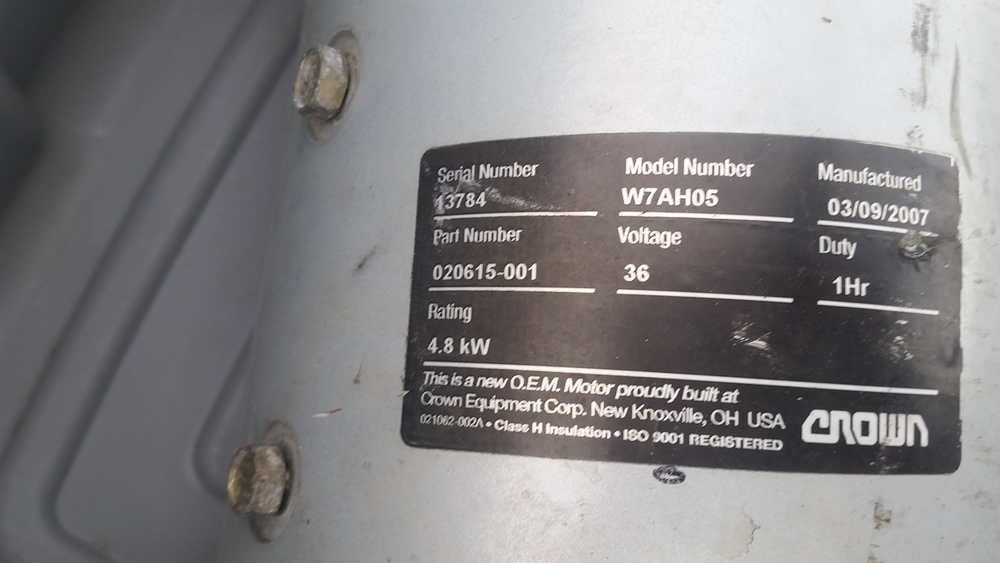
电机铭牌(点击放大)
电机铭牌(点击放大)
我们发现在电机上ebay.com,知道这工作,仅此而已。我们选择这个特定的马达的原因有三:
它被评为在4.8KW在36V这是足以满足我们的需求。
这是过度建设用于工业应用。这意味着它有强大的部件,并且容易更换来源刷。
电机花费我们$ 125元!由于这整个“电比克”项目只是一个大的实验中,我们试图在每一个角落,让我们的开销很小。
我们的电机重量为110磅,比其直流无刷兄弟姐妹就像那些在现有的电动船市场上使用相当多的。虽然它可能是一个小的效率较低,其成分是更坚固耐用。它是重负荷,低成本,并提供充足的电力,具有简便且容易找到份为额外的奖励。我们可能会每不得不更换仅部分是8碳刷用电传送到电机电枢(即在内侧旋转的部分)。根据用途,他们可以持续多年没有穿出来,约80 $,我们可以买一个完整的设置更换有遇难。就是这样,几乎不需要维修,只用1运动部件,电动机本身是相当简单的。在我们的船,简单往往是设备选择的决定性因素。
这种电机恰好与激磁场和电枢(或SEPEX)接线。这只是意味着我们有超过电机功率输出更多的控制。我们可以调下来能有更多的低端扭矩,或最多获得高端的速度。这将使我们能够定制我们需要为我们的具体船上的动力输出。还有一些其它类型的电机在那里包括系列和永磁只能有一个组线圈。每种类型都有自己的优点和缺点。但是,我们不会得到任何的这里。如果您想了解更多有关直流电动机,请点击这里。
我们没有买新的。 。 。
因为我们从三个不同的公司已收到报价:
点击这里查看我们从OceanVolt报价为他们的AX8电机,
看到他们为我们的船计算这里。
点击这里查看我们的安纳波利斯从混合式海洋报价为托俄萨7000HT电机。
阅读他们的功耗和电池消耗HERE预测。
点击这里查看从电动游艇的一些数据和预测他们相当力矩电机20。
我们整个成立。 。 。
花费我们只是$ 1,400。
正如你可以在上面看到的报价,电机和辅助线都在$ 10,000的价格区间。不包括一电池组。我们的电机和接线花费了我们不到$ 500。我们的许多部件进行了翻新,使用或从船上打捞被拆除,其中包括一些布线。该电池组和额外的工具,如压线钳和切割机是另一个$ 500。因此,对于约1000 $,我们安装了我们的电比克系统。我们的计费系统最终只有400 $得益于成本我们几个惊人的公司谁加入了我们的乌玛天使家庭及提供的主要组成部分。了解更多有关“充电”一节我们的收费制度。
打破下来:
$ 500个_电机,控制器和补充布线。
$ 500个_代替电池。
$ 400 _对于太阳能充电器,面板和比米尼修改。
所需电力。 。 。
推动我们的船和你的。
“'船体速度”和“冗余电源”是不是我们在我们的系统担心。“
我们的电机有一个8HP评级。对于那些习惯于气体或柴油发动机,这似乎不是很多力量。但是,用于气体发动机和电动马达的评级系统是如此不同,比较数字几乎是毫无意义的。它归结为这样两种类型的电机用自己的能量和扭矩曲线,这是完全不同的。据研究,我们都做了,一个1马力的气体(或柴油)发动机可以在平静的条件下推500磅位移船体速度。现在,不同意的来源一点点在这里,但作为一个经验法则一1HP电动机可以推动比汽油相当于约3至3.5倍以上排量。因此,一个1HP电动机,拉丝750W,可以推动约1500磅的位移。
我们的船排水量13500英镑。因此,13500/1500 = 9HP电动机。
现在1HP(电动)得出约750瓦。所以,9HP点ˉx750W = 6.75kW电动机。
电源|速度|范围
瓦(×100)范围(KTS)
将鼠标悬停在任何时候看到确切的数据。例如,据估计,在2.7 KTS我们的电机上600瓦特(蓝色),给我们一个范围65海里(灰色)。此图是基于一个14kW的锂电池银行和高端电机/控制器组合。
在48V,我们的电机应该给我们6.3KW,这比我们需要我们的船推到船体的速度在平静的条件下略显不足。但是,这是我们从来没有打算这样做。这需要大量的电力来推动位移船船体的速度。所以,你走慢,更大范围的会。然而,它需要很长的时间以覆盖该距离。所以,有一个甜蜜点对周围4 KTS(见右图),您好好进展,而保守与功耗。当然,这些仅仅是建议。现实世界的情况很少是完美的,加入30%的冗余往往被很多汽车公司推荐。
我们只用电动机近距离机动航行的地方是不是一种选择,就像一个码头,或紧锚地,所以“船体速度”和“冗余电源”是不是我们担心我们的设计系统时。我们经常航行,并打爆,选择的地方周围几条船锚泊。
这里有一些伟大的公司。 。 。
这INSTAL,出售,或可以帮助回答你的问题。
五雷轰顶-EV和EV-西由谁愿意听取您的意见并帮助回答你的任何问题,伟大的人民组成。他们都提供了适合任何船的需求DIY套件。他们还可以帮助源充足的电池组,太阳能帮忙,甚至找当地的专家来协助安装以及。
如果你正在寻找一个更加“即插即用”的成立,看看下面的公司。他们代表了行业中的佼佼者,并会很乐意定制一组为您的特定需求,并提供了一个详细的报价。
ELCO汽车
ELCO MOTORS
elcomotoryachts.com
info@elcomotoryachts.com
1(877)411-3526
Oceanvolt SEA
OCEANVOLT SEA
oceanvolt.com
sales@oceanvolt.com
+358 10 325 5281
托俄萨
托俄萨
clean-e-marine.com
sreuther@annapolishybridmarine.com
+1(410)353-4348
电动游艇
电动游艇
electricyachtsocal.com
mike@electricyachtssocal.com
1(855)339-2248
Electroprop
ELECTROPROP
electroprop.com
electroprop@icloud.com
+1(805)455-8444
想要了解更多的...?
下面是关于“多少电,你真的需要另一个伟大的文章?
还有疑问?
首先,请继续阅读,我们可以在下面回答这些问题。如果没有,头向电比克论坛,并要求他们在那里。
我们很高兴你做了这一步,希望你学到了一些东西。我们相信好的创意应该是对所有人开放。但是,不管你做什么?
不要点击下面的按钮捐赠,因为这可能会使你感到温暖和模糊内。
THE MOTOR
You don’t need a diesel . . . for ocean passages.
"We have no schedules requiring that we make it back to the dock on time."
Many people have written in and commented that an electric motor is only good for day sailors who weren’t going very far each day, and that you need a reliable diesel engine for long distance cruising. But we feel like the opposite is true. Since we don’t have a dock to tie up to and charge our batteries each night, we rely on sailing to recharge our system. The longer we sail and the more sun we get, the more power we make. Because we don’t have a 9-5 to return to at the end of a fun weekend out on the boat, we have no schedules requiring that we make it back to the dock on time, no matter what the wind is doing. So, we feel that an electric motor, depending on your sailing style, can be adapted to any boat. But, you have to be willing to work around the one major draw back, range.
Range is the one major downside to an electric motor. But, with a sailboat, and some adequate sailing skills, we have found we really don’t need a motor as much as we originally thought. For those who do have schedules, the possibility of a hybrid system may work well. It encompasses all the benefits of an electric system with the added back up of a diesel or gas genset rated to supply adequate power for extended motoring. Some companies even offer an electric motor, like this one, that can be installed in parallel to an existing diesel motor. So the majority of motoring is done with the traditional diesel, however for short periods of time, like moving around the marina, the electric drive can be used instead. This also incorporates the added benefit of capturing power from the spinning prop while sailing, often referred to as "regeneration" or "regen".
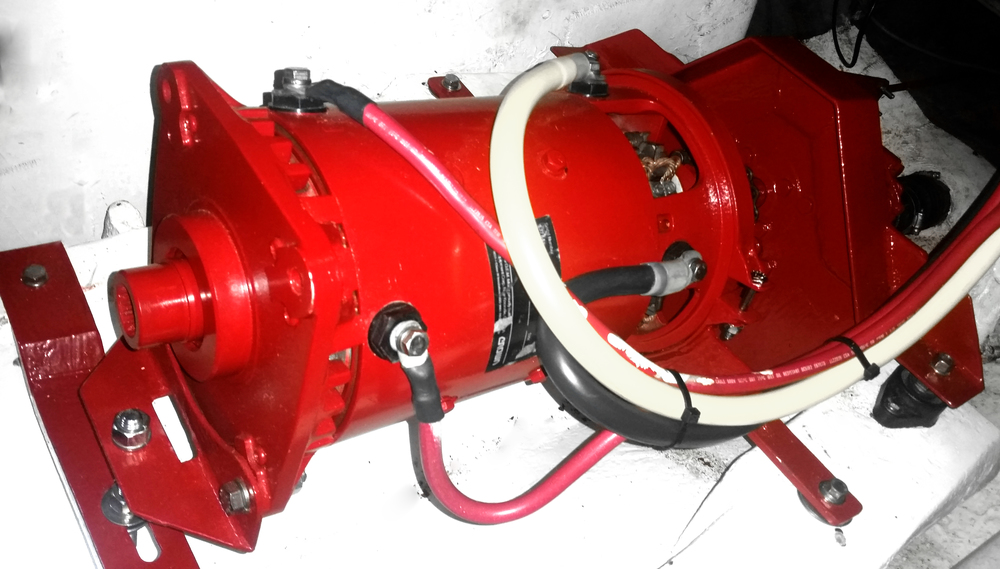
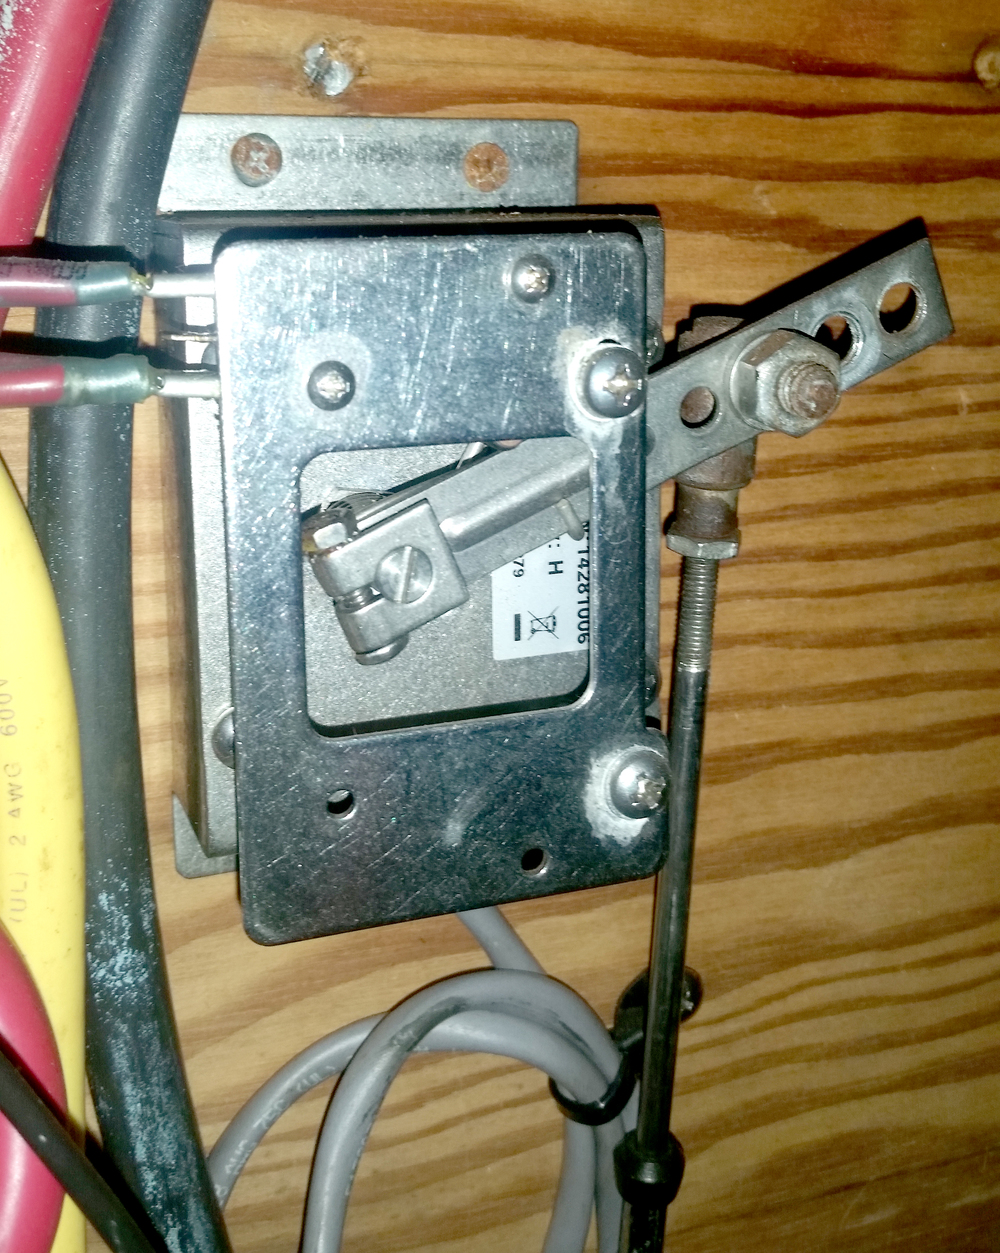
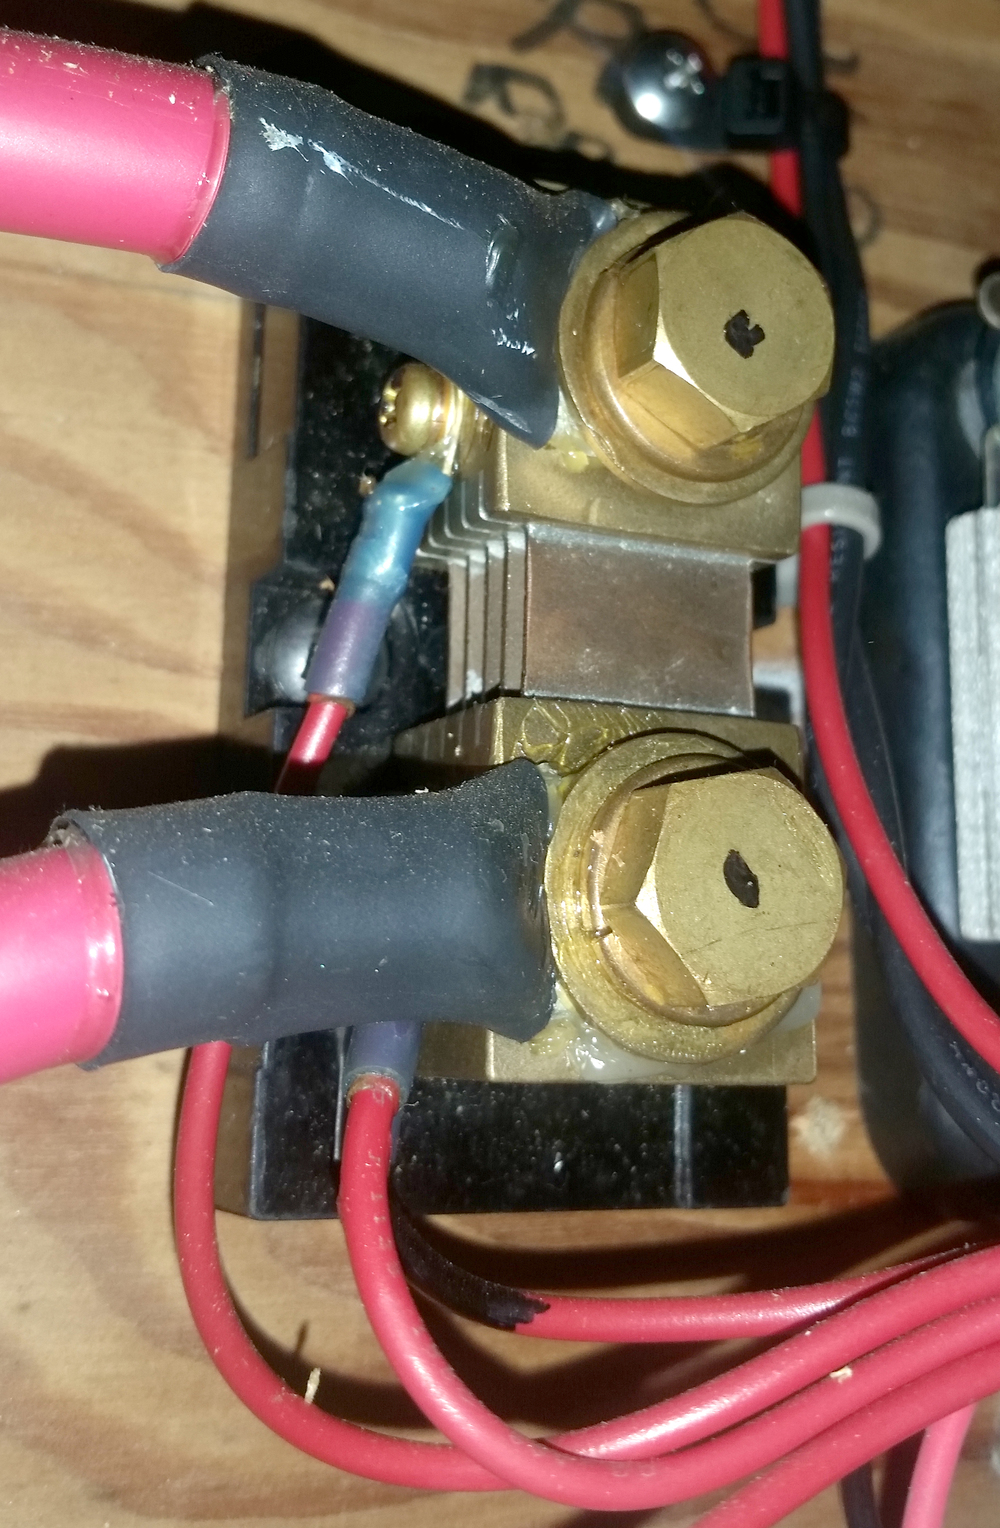
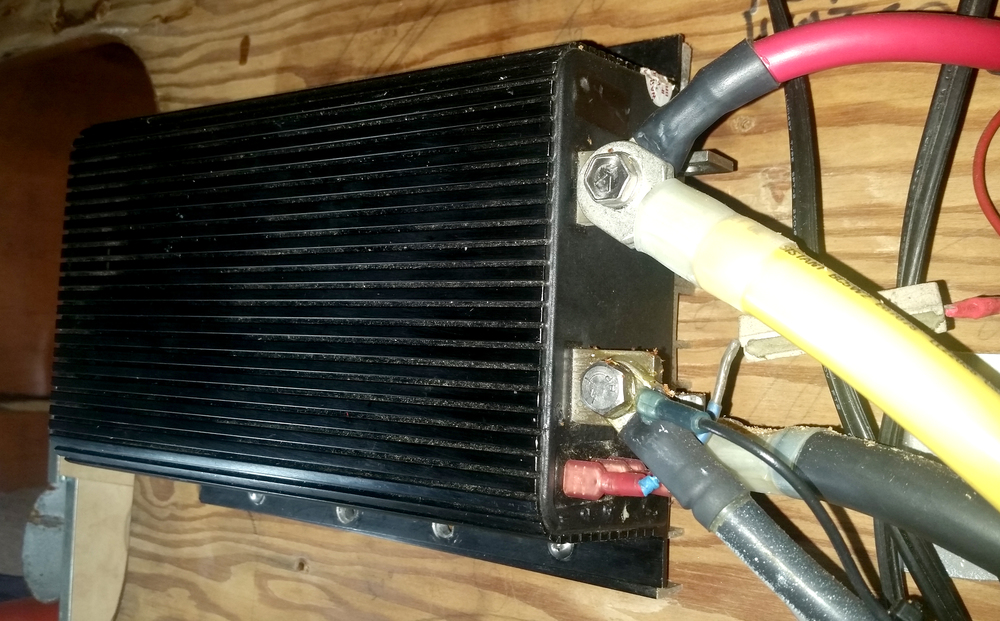
Our conversion to electric . . . started with our motor.
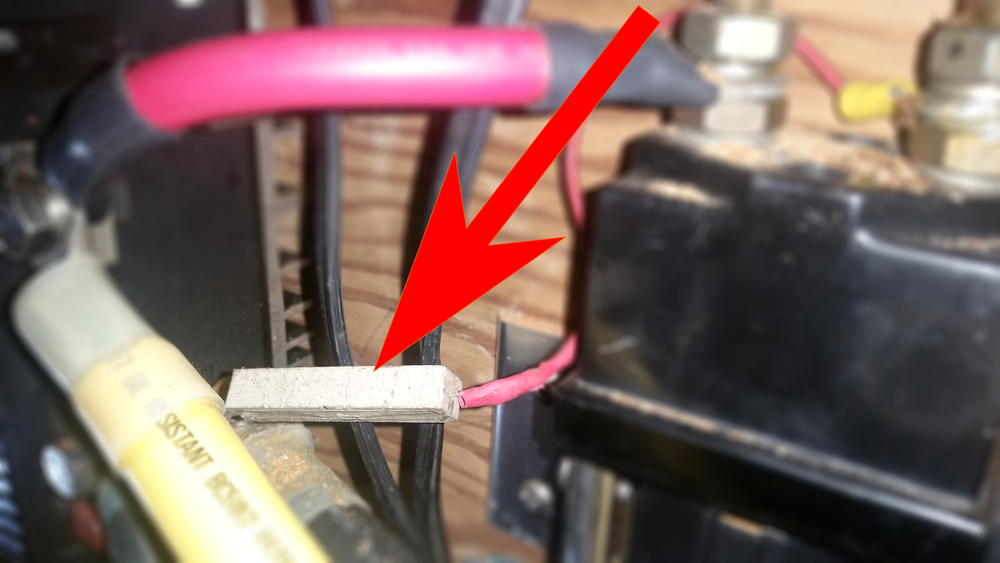
Motor Label (Click to enlarge)
We found the motor on ebay.com, knew it worked and that was about it. We chose this specific motor for three reasons:
- It was rated at 4.8kW at 36v which was adequate for our needs.
- It was overbuilt for an industrial application. This meant it had robust parts and easy to source replacement brushes.
- The motor cost us $125! Since this entire “Electro-Beke” project is just one big experiment, we tried at every corner to keep our expenses minimal.
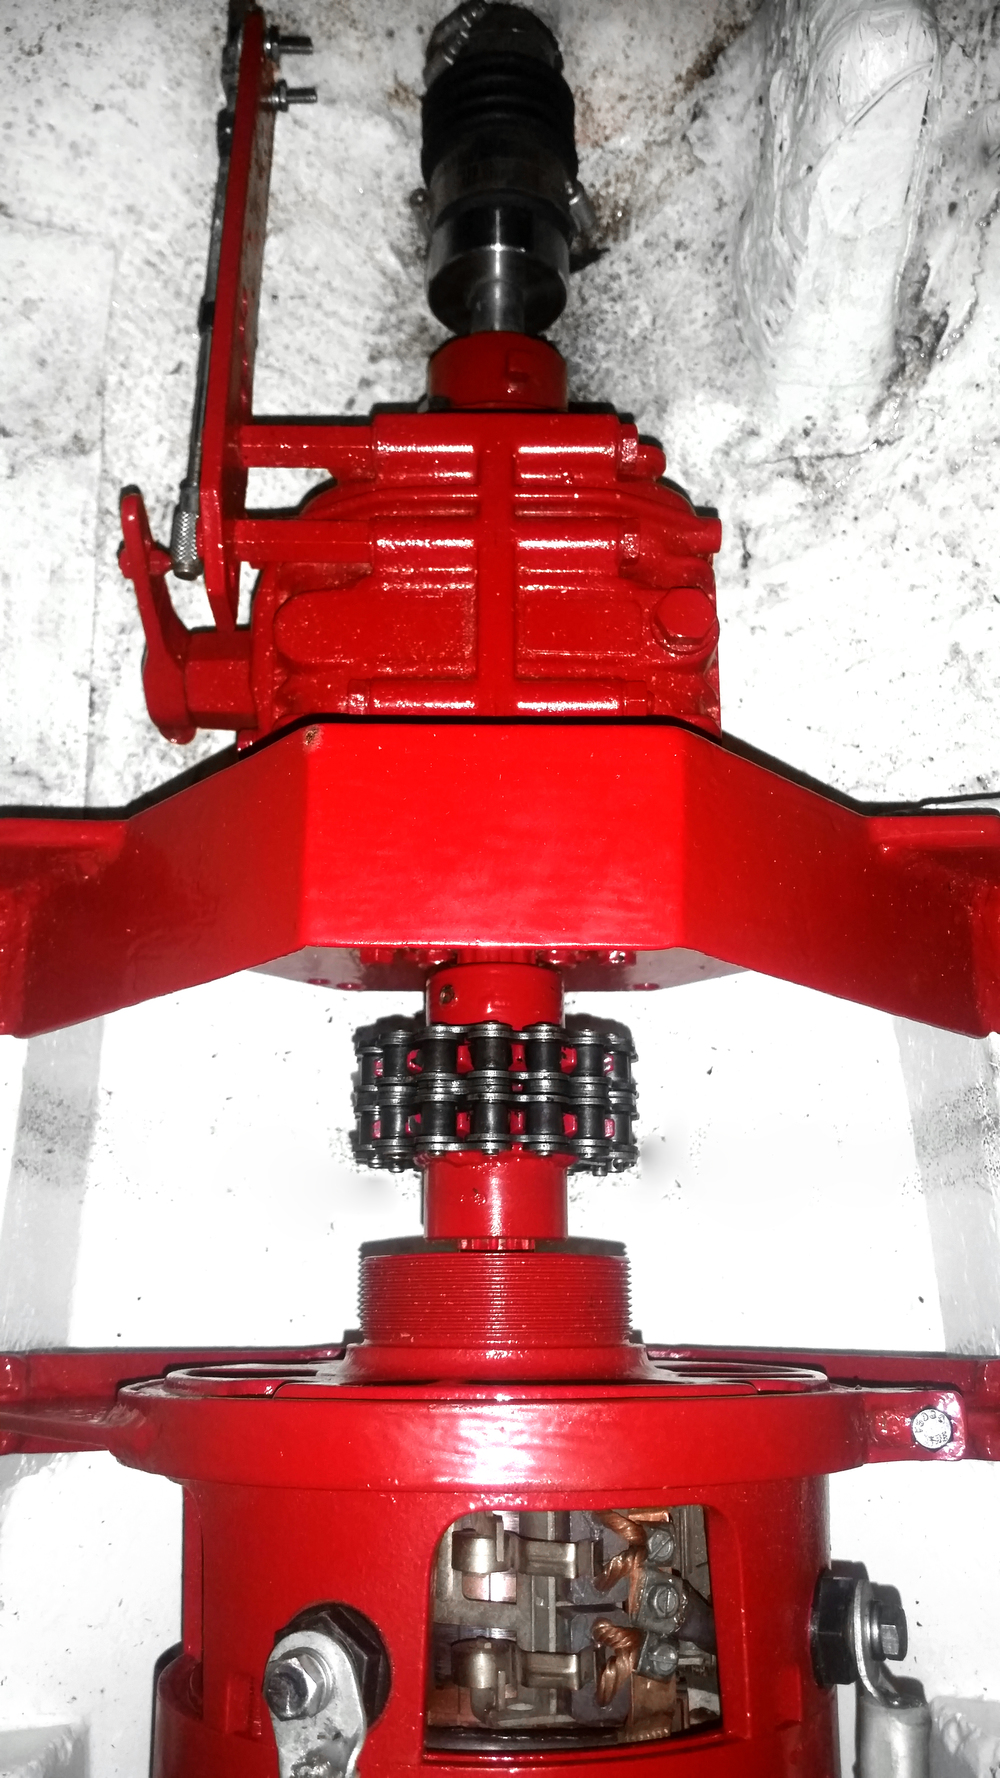
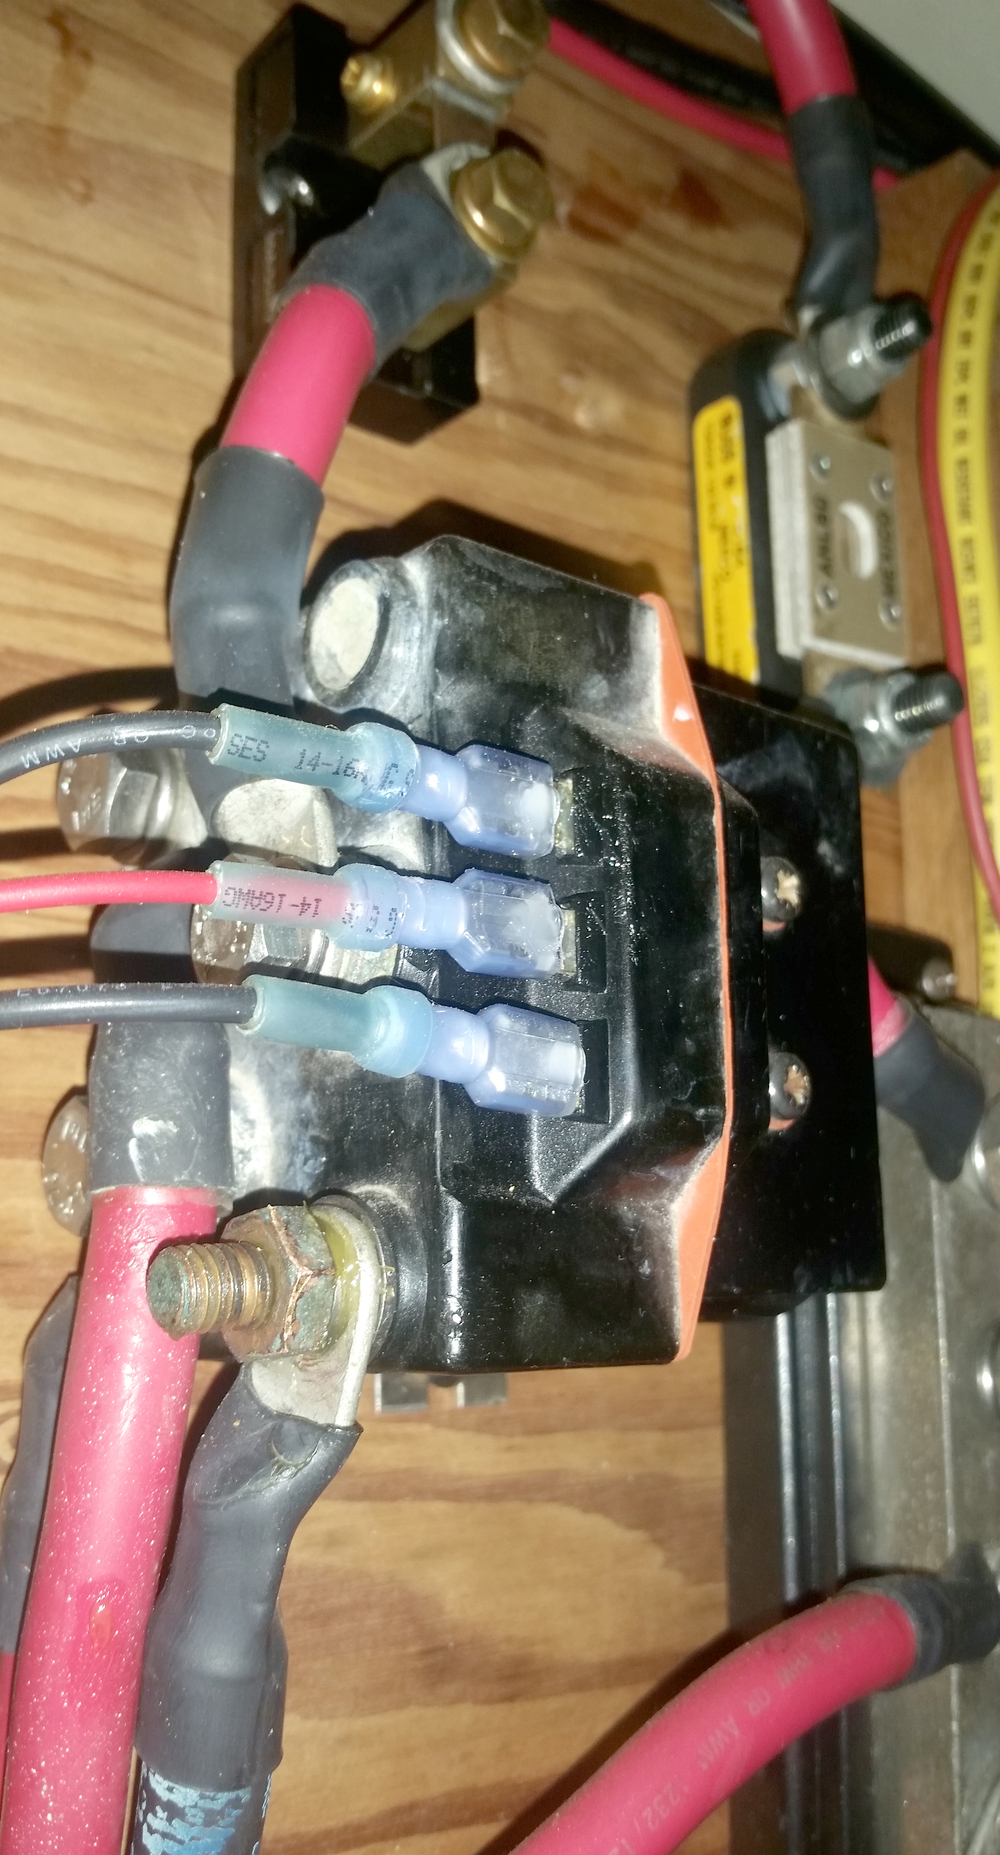
Our motor weighs 110 pounds, which is quite a bit more than its brushless DC siblings like those used in the existing electric boat market. Although it is probably a little less efficient, its components are much more robust and durable. It is heavy duty, low cost and provides adequate power, with the added bonus of being simple and easy to find parts for. The only parts we will likely every have to replace are the 8 carbon brushes that transfer electricity to the motor armature (the part that spins on the inside). Depending on use, they can last for many years without wearing out, and for about $80 we can buy a complete replacement set to have onboard. That's it, virtually maintenance free, with only 1 moving part, the motor itself is relatively simple. On our boat, simplicity is often the defining factor for equipment selection.
This motor happens to be wired with separately excited field and armature (or SEPEX). It just means that we have a lot more control over the motors power output. We can tune it down to have more low end torque, or up to gain high end speed. This will allow us to customize the power output we need for our specific boat. A few other types of motors out there include, Series, and Permanent Magnet that only have one set of coils. Each type has its own benefits and drawbacks. But we won’t get into any of that here. If you would like to know even more about DC motors, click HERE.
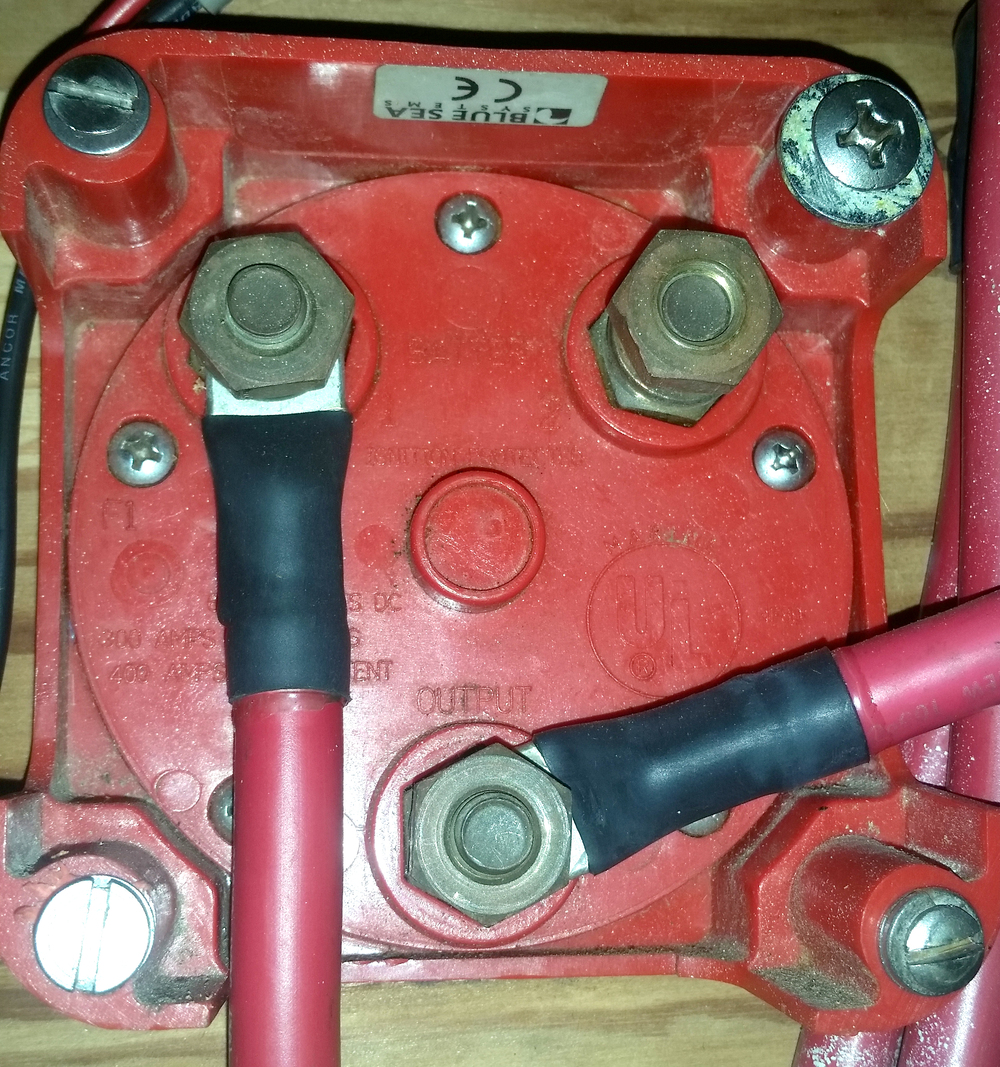
we didn't buy new . . .because we received quotes from three different companies:Our entire set up . . . cost us just $1,400. As you can see by the above quotes, The motors and supplementary wiring are all in the $10,000 price range. That doesn't include a battery bank. Our motor and wiring cost us just under $500. Many of our components were refurbished, used or salvaged from boats being demolished, including some of the wiring. The battery bank and additional tools, like wire crimpers and cutters were another $500. So, for about $1000, we installed our Electro-Beke system. Our charging system ended up costing us only $400 thanks to a few amazing companies who joined our Uma Angels Family and supplied the major components. Find out more about our charging system in the "Charging" section below.
That Breaks down to:$500 _ for the motor, controller and supplementary wiring.
$500 _ for the batteries.
$400 _ for the solar charger, panels and bimini modifications.
Power required . . .to push our boat and yours.
"'Hull speed' and 'redundant power' weren't something we worried about in our system."
Our motor has an 8hp rating. For those accustomed to gas or diesel engines, this may not seem like much power. But, the rating systems used for gas engines and electric motors are so different that comparing the numbers is almost meaningless. It comes down to the way the two types of motors use their energy and torque curves, which is quite different. According to the research we have done, a 1 hp gas (or diesel) engine can push 500 pounds of displacement to hull speed in calm conditions. Now, the sources disagree a little here, but as a rule of thumb a 1hp electric motor can push about 3 to 3.5 times more displacement than its petrol equivalent. So a 1hp electric motor, drawing 750W, can push about 1500 pounds of displacement.
Our boat displaces 13,500 pounds. So, 13,500 / 1500 = 9hp electric motor.Now 1hp (of electric) draws about 750 watts. So, 9hp x 750W = 6.75kW electric motor.
Power | Speed | Range
Hover over any point to see exact data. For example, it is estimated that at 2.7 kts our motor will draw 600 watts (blue), giving us a range of 65 nautical miles (grey). This graph is based on a 14kW Lithium battery bank and a high end motor/controller combo.
At 48V, our motor should give us 6.3kW, which is slightly less than what we would need to push our boat to hull speed in calm conditions. But that is something we never intend to do. It takes a lot of power to push a displacement boat to hull speed. So the slower you go, the greater your range will be. However, it takes a long time to cover that distance. So, there is a sweet spot right around 4 kts (see graph to the right) where you make good headway, while being conservative with your power consumption. Of course, these are merely suggestions. Real world conditions are rarely perfect and adding 30% redundancy is often recommended by many motor companies.
We only use our motor for close quarter maneuvering where sailing isn't an option, like a marina, or tight anchorage, so "hull speed" and "redundant power" weren't something we worried about when designing our system. We often sail on and off the hook and choose places to anchor with few boats around.
Here are some great companies . . .that instal, sell, or can help answer your questions. Thunderstruck-EV and EV-West are staffed by great people who would love to hear from you and help answer any questions you may have. They both offer DIY kits that will suit the needs of any boat. They can also help source adequate battery banks, help with solar and even find local experts to assist with installations as well.
If you're looking for a more "plug and play" set up, check out the companies below. They represent the best in the industry and will gladly customize a set up for your specific needs and provide a detailed quote.
 ELCO MOTORS ELCO MOTORS
info@elcomotoryachts.com 1 (877) 411-3526
 OCEANVOLT SEA OCEANVOLT SEA
sales@oceanvolt.com +358 10 325 5281
 THOOSA THOOSA
sreuther@annapolishybridmarine.com +1 (410) 353-4348
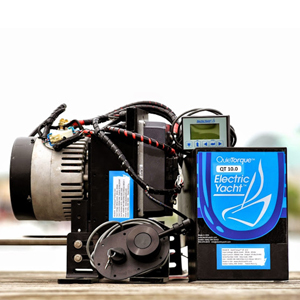 ELECTRIC YACHT ELECTRIC YACHT
mike@electricyachtssocal.com 1 (855) 339-2248
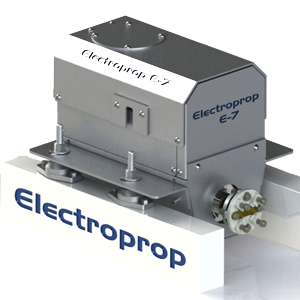 ELECTROPROP ELECTROPROP
electroprop@icloud.com +1 (805) 455-8444
Want to learn even MORE...?Here is another great article about "How much electric power do you really need?
Still have questions?First, keep reading, we might answer them below. If not, head over to The Electro-Beke Forum and ask them there.
We're glad you made it this far and hope you learned something. We believe good ideas should be accessible to all. But, whatever you do... DON'T click the donate button below, because it might cause you to feel warm and fuzzy inside.
|